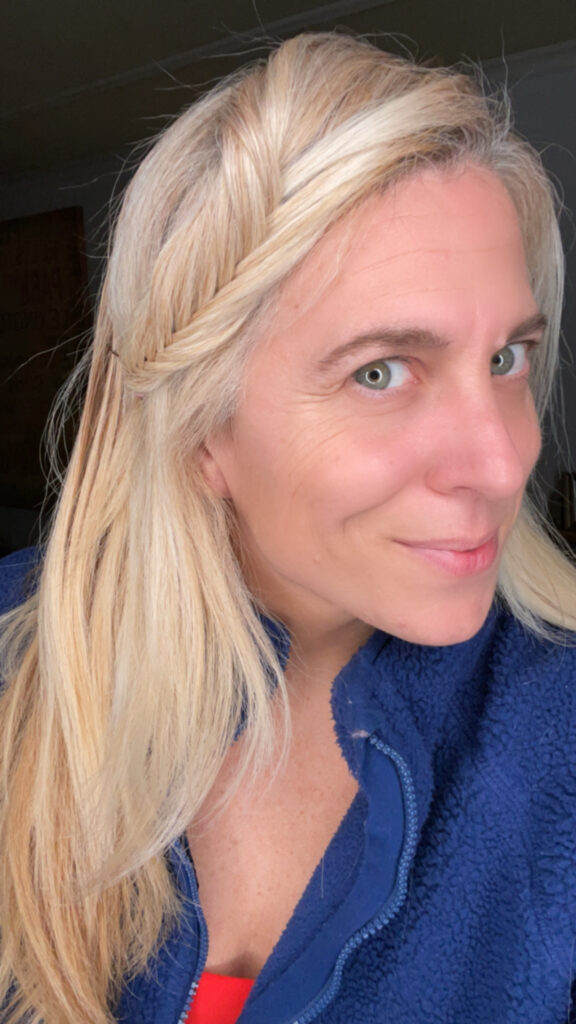
One of my favorite braid hairstyles is a fishtail braid. It’s simple and easy and chic. I’m showcasing today how to do a side fishtail braid tutorial. This is a hairstyle that I’m obsessed with because it works for just about any occasion. It’s also a hairstyle that once mastered can be done super quickly.
Side Fishtail Braid Tutorial
This hairstyle works for anyone at any age. What I love about this side fishtail braid is that it’s one of those styles that just works for everyday or for occasion. There’s not many hairstyles you can say that about when it comes to creating doable hairstyles. I just think it’s pretty, elegant and cute on someone’s hair.
When it comes to creating a side fishtail braid, all you need to do is make sure you can cross over sections of hair. That’s essentially the side fishtail braid step by step tutorial portion of it. I try my best in the video to slow it down so you can really get a good idea of how to do it. I promise – as soon as you know how to cross sections of your hair over the other, you’ll have this one down perfectly.
YouTube on Hair Tutorials
I created a YouTube channel showcasing more of our hairstyles that I create on Instagram and TikTok. The beauty of this YouTube channel is that I can slow down the hair tutorials and really allow you to see the true step by step actions. You’ll see in all of them that I like to talk my way through them so you can get a good idea of what I’m doing.
This side fishtail braid tutorial is one that I did on my own hair. I feel like it’s super easy to do one on someone else’s hair, but I wanted to showcase how you can easily do one on your own hair, too. It’s just a matter of taking your time and mastering each step in this hairstyle.
The only products you need for this one is an elastic and a few bobby pins. Depending upon how thick your hair is will determine how many bobby pins you need. My hair is super thick, so I usually have to use two or three of them. My daughter’s hair isn’t as thick, so I can get away with using one or two.
As you can tell I really took it slow and wanted to make sure I walked through each step one by one. I’m all about this hairstyle and excited to share this one. The best thing is that you can even do this on both sides of your hair. You can almost make a “headband” of sorts with the fishtail braid.
Once you’re done you can easily go through and pancake out the braid. This will give it more of a boho type look. I adore this style because you can really make it look like a different braid by pulling it out more and more to make it look pretty and chic. It just looks so perfect pinned back behind your ear or you can tuck it into a ponytail hairstyle, too.

I would love to see how you did with this hairstyle. Make sure you tag me and let me know (@AudreyMcClellan) how you do. I would love to share on Instagram. This one is a fun one for you to do, I promise! And once you get the hang of it, you will love doing this style over and over again.
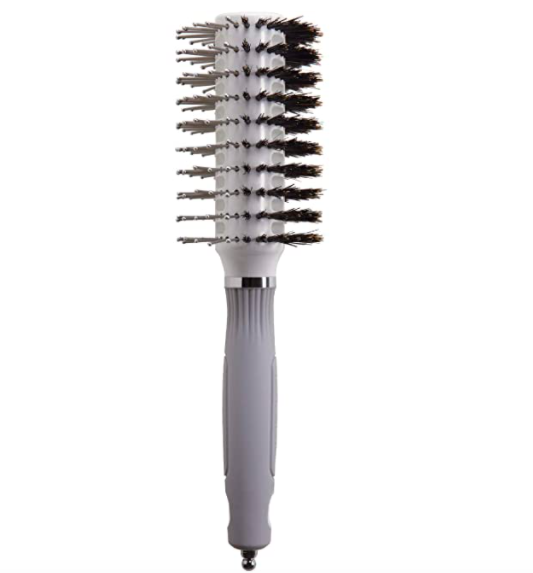
BRUSH – Make sure you have an amazing brush for your child’s hair. The thing with brushes is that depending on the texture of your child’s hair, it depends on the brush you’ll need. I recommend this Olivia Garden Round Brush with ionic and boars bristles. It works amazing to get out tangles and snarls.
Conditioning Mist – You need to have a good product that can keep your child’s hair smooth and tangle-free. I’m obsessed with Pantene’s Conditioning Mist. It’s like a magic spray. I don’t know what formula is inside of it, but whatever it is – it works like a charm on Victoria’s hair.

Small Elastic Bands – These are one of the best things to have on hand because many times you’re using bulkier elastics and it’s tough to keep them in place in the hair. This way your hair can have smaller elastics. You can find about 500 for $5! Check out these elastics that we use.
Moroccanoil Hydrating Styling Cream – I love this product!

What it is: A leave-in hair styling cream that’s infused with argan oil and anti-static ingredients to condition, hydrate, and reduce frizz.
Hair Type: Straight, Wavy, Curly, and Coily
Hair Texture: Fine, Medium, and Thick
Key Benefits: Prevents Dryness, Fights Frizz, and Maintains Hold
Formulation: Cream

A concentrated treatment that strengthens the hair from within, reducing breakage and improving its look and feel.
Key benefits:
– Addresses damaged and compromised hair
– Strengthens and protects hair structure
– Restores healthy appearance and texture
If you want to know more…
No. 3 Hair Perfector is not a conditioner, it’s an at-home treatment that contains the same active ingredient found in all professional Olaplex products.
Created by two of the top PhD’s in chemistry and materials science, Olaplex products feature first-of-their-kind, patented, bond-building technology, which relinks the broken disulfide bonds caused by chemical, thermal, and mechanical damage to the hair.
This formula is made to work with every hair type, providing real, structural repair that works from within.
Check out my post on Running Late Hairstyles, too. Hopefully you can get some use out of some of these!